Symbol puzzles, all four of them
G-46C: both levers into the blue zone, then top row 3 and 4, middle row 2, bottom row 3. The 4×4 grid has no fixed answer, and the ring door is read from the tunnel, not the door.
The answers, one per panel
Four different puzzles in this game are searched as "the symbol puzzle". They are not the same puzzle and they do not share an answer:
| Panel | Where | The answer |
|---|---|---|
| G-46C, fifteen buttons | Chapter 5, Temporal Research Centre | Both levers into the blue zone, then top row 3 and 4, middle row 2, bottom row 3 |
| 4×4 grid and three dials | Chapter 3, the assembly line | No fixed answer: read the four symbols in order, press them in order, then match three numbered dials |
| Ring symbol door | Chapter 6, the ring tunnel | Three symbols on the door, six rings in the tunnel: press the matching ring for each, in order |
| Heavy goo pressure plate | Chapter 3, magnetic stabiliser | One stands on the plate, the other shoots them with goo so the plate reads two bodies |
Each is written out below.
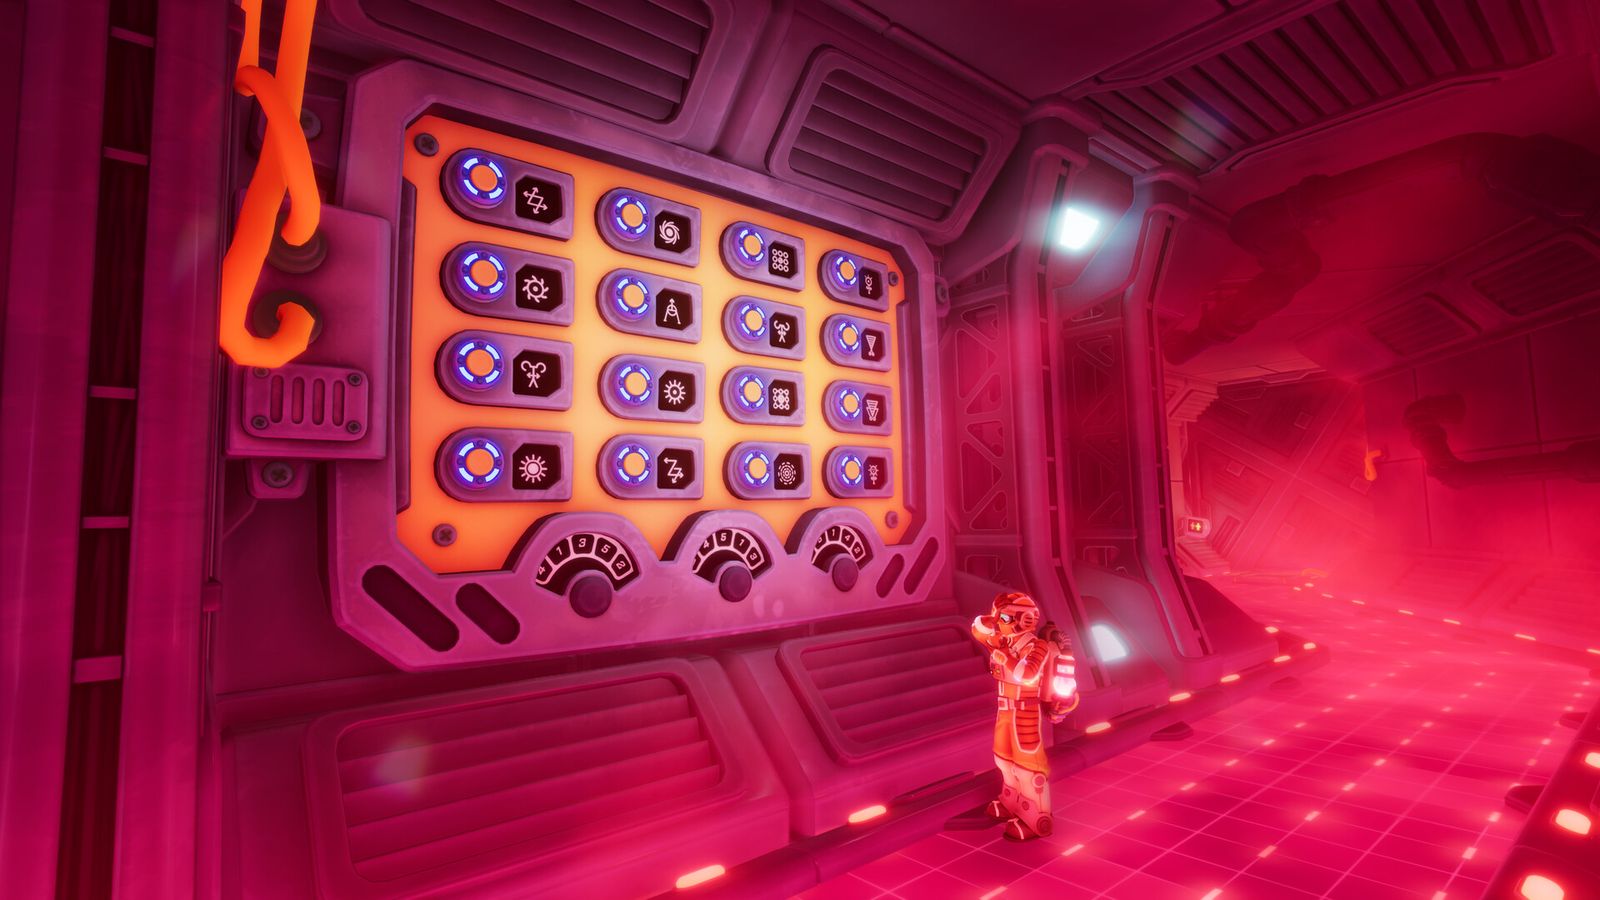
G-46C: the fifteen-button panel
This is the one with a fixed answer, and it is the one most people mean.
- Set both levers on the G-46B side so their pointers sit in the blue zone.
- On the G-46C panel, count rows from the top and buttons from the left.
- Press top row, button 3 — the bar with two up arrows.
- Press top row, button 4 — the small diamond.
- Press middle row, button 2 — the circle with a line through it.
- Press bottom row, button 3 — the diamond on a stem.
Four lamps sit above the panel. They light when the input is right; if they stay dark, clear the panel and read the shapes again rather than pressing harder.
Why the same answer can fail
The button positions are fixed across the runs we have. The glyphs drawn beside them are not — a reset can redraw the faces while the buttons stay put, which is how a pair ends up arguing about which button is "the diamond" when they are both looking at a different redraw.
So the sequence above is the answer, and the descriptions are only a check. If your panel's glyphs match the descriptions, press the positions. If they do not, count the positions and ignore the shapes.
The G-46B side is the half people skip: read its orange screen row by row and treat the parts as a parts list. The finished symbol has to contain every part on both rows. Our sources disagree on one detail — one describes a dial on G-46B, another describes two levers. Both describe the same blue zone, so set whatever your panel has until its pointer is blue and stop there.
The 4×4 grid and three dials
This one has no fixed answer and any guide that prints one is guessing.
- The reading player sees four symbols on a Norček panel, one at a time.
- The pressing player finds each symbol on the 4×4 grid and presses it, in that order.
- A wrong press resets the set and draws new symbols. It does not undo the puzzle, but it does invalidate the sequence you were working from.
- When the symbols are accepted, three numbered dials appear. Set each dial to the position the reading player currently sees.
The symbols change every round and between playthroughs, so the useful skill is description, not memory. Describe the centre first — filled or hollow — then the arrows and which way they point, then any surrounding ring or spokes. "Sun with eight spokes, all pointing out" is a solvable description. "The sun one" is not.
The ring symbol door
The door player pulls the lever and reads three symbols off the screens in order. The tunnel player walks the rings, finds the ring whose outside symbol matches each one, and presses that ring's button in the same order.
In our sources the three symbols were eight small circles around a large circle, then a crosshair with arrows pointing outward, then a striped circle overlapping a hollow circle — which resolved to ring 4, ring 1, ring 5. Two independent guides give the same three numbers for the same three descriptions.
That is one session's answer, not a universal one. The symbols are drawn per run and the ring numbers may differ in yours; the method is what transfers. Watch the arrows in particular: outward-pointing and inward-pointing crosshairs sit on two different rings.
The heavy goo pressure plate
Not a symbol puzzle in the strict sense, but it is the room people are in when they search for one.
The magnetic stabiliser plate is weighted for two people and only one of you can reach it. The fix is the Goop Gun: the player on the plate gets shot with goo, which makes them heavy enough for the plate to count them as two. Shoot them again to undo it, which matters because the goo also slows them down for the next room.
Where this was checked
G-46C: two independent sources, one of which names the third-party guide it cross-checked, and both agree on the four button positions and the blue zone. Ring door: two sources, same three numbers. 4×4 grid and three dials: two sources, both describing a per-run answer rather than a fixed one. Pressure plate: two sources. The G-46B lever-versus-dial discrepancy is printed rather than smoothed over. Build checked: 1.1.2, 23 October 2026.